Using google-code-prettify in your blog
Until now to make my source code pretty I’ve used a pretty dodgy method that involved going from Visual Studio to Word to Blogger and surrounding the lot in a div to apply some styles to the whole thing.
This has resulted in HTML source looking something like this:
<div style="background-color: #f0f0f0; border: 1px dashed #CCCCCC;">
<div class="MsoNormal" style="margin-bottom: 0.0001pt;">
<span style="color: red; font-family: Consolas; font-size: 9.5pt;">position</span><span style="font-family: Consolas; font-size: 9.5pt;">:<span style="color: blue;">fixed</span>;<o:p></o:p></span></div>
<div class="MsoNormal" style="margin-bottom: 0.0001pt;">
<span style="color: red; font-family: Consolas; font-size: 9.5pt;">top</span><span style="font-family: Consolas; font-size: 9.5pt;">:<span style="color: blue;">50%</span>;<o:p></o:p></span></div>
<div class="MsoNormal" style="margin-bottom: 0.0001pt;">
<span style="color: red; font-family: Consolas; font-size: 9.5pt;">left</span><span style="font-family: Consolas; font-size: 9.5pt;">:<span style="color: blue;">50%</span>;<o:p></o:p></span></div>
<div class="MsoNormal" style="margin-bottom: 0.0001pt;">
<span style="color: red; font-family: Consolas; font-size: 9.5pt;">width</span><span style="font-family: Consolas; font-size: 9.5pt;">:<span style="color: blue;">200px</span>;<o:p></o:p></span></div>
<div class="MsoNormal" style="margin-bottom: 0.0001pt;">
<span style="color: red; font-family: Consolas; font-size: 9.5pt;">height</span><span style="font-family: Consolas; font-size: 9.5pt;">:<span style="color: blue;">150px</span>;<o:p></o:p></span></div>
<div class="MsoNormal" style="margin-bottom: 0.0001pt;">
<span style="color: red; font-family: Consolas; font-size: 9.5pt;">margin-top</span><span style="font-family: Consolas; font-size: 9.5pt;">:<span style="color: blue;">-75px</span>; <span style="color: darkgreen;">/* negative half height */</span><o:p></o:p></span></div>
<span style="color: red; font-family: Consolas; font-size: 9.5pt; line-height: 115%;">margin-left</span><span style="font-family: Consolas; font-size: 9.5pt; line-height: 115%;">:<span style="color: blue;">-100px</span>;
<span style="color: darkgreen;">/* negative half width */</span></span></div>
Disgusting I know, not only does it look gross but it also makes it a lot more difficult to work on posts using my mobile. So I decided to look into a prettyprint alternative, I found google-code-prettify as one of the first search results and went into investigate. It is a very simple process to get it up and running using the following steps:
- Download the code
- Include the css file
- Include the js file
- Add an onload to the body tag like this
<body onload="prettyprint()"> - Surround multiple-line source code in a
<pre class="prettyprint">tag - Surround inline source code in a
<code class="prettyprint">tag
There are a couple of problems with these steps when using a blog; first where are the files coming from, and second you can’t add an onload event to the body tag from a blog post (you may be able to by changing the template but you should avoid that at any cost).
I went and found a content delivery network that served google-code-prettify, unfortunately google itself doesn’t as it isn’t popular enough so I had to look elsewhere. The second problem can be solved by simply adding the call to prettyprint() at the end of the document.
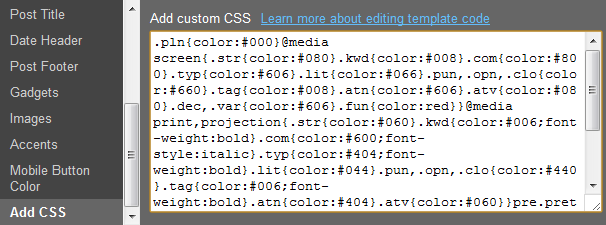
As for the CSS file, you’ll want to integrate it into your blog’s CSS. For blogger follow these steps:
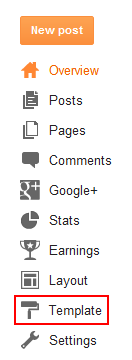
Step 1 - Firstly select the template option from the menu on the blogger dashboard
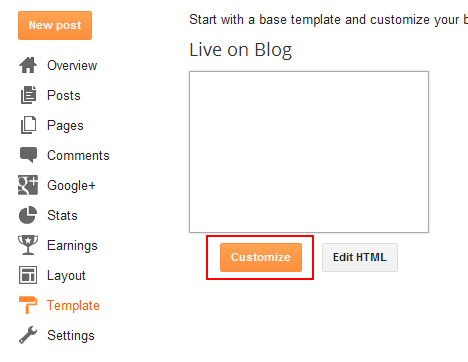
Step 2 - You want to customise your template
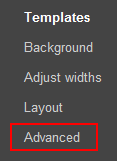
Step 3 - Select advanced
Step 4 - Scroll down and select add CSS
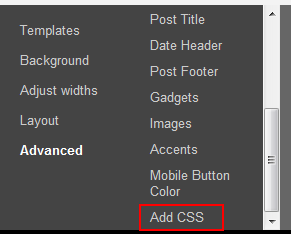
Step 5 - Add the google-code-prettify CSS to the textarea, make any adjustments to it and save.
Alternatively you could paste the CSS into the bottom of each post, this will have the downside of the homepage that lists your posts to be larger than required by duplicating styles.
In the past I was pasting the following code at the end of posts that contain code:
<script src="http://cdnjs.cloudflare.com/ajax/libs/prettify/188.0.0/prettify.js" type="text/javascript"></script>
<script src="http://cdnjs.cloudflare.com/ajax/libs/prettify/188.0.0/lang-css.js" type="text/javascript"></script>
<script type="text/javascript">prettyPrint()</script>
This does work but creates extra overhead when creating a post. Ideally you will want to include the scripts towards the end of the actual template HTML. However, I wouldn’t recommend touching the template’s HTML unless you know what you’re doing.
This whole process allows the use of the following markup instead of the horrible wall of text at the top:
<pre class="prettyprint"><code>
position:fixed;
top:50%;
left:50%;
width:200px;
height:150px;
margin-top:-75px; /* negative half height */
margin-left:-100px; /* negative half width */
</code></pre>


